Images from the Id – Timing or In Search of the Eagle Part 1
This is a tale of frustration and success. It repeats itself over and over. Scenario – Every winter the Bald Eagle can be found in locations where it normally isn’t found during the breeding season. Locally, there is a reservoir where photographers have the chance of photographing the eagles at comparatively closer distances. This year I have seen 5-6 adults and 1 or 2 immature individuals. Sunday morning, we arrived at the park at about 9 am usually eagles don’t have specific feeding or activity time like some birds. We wanted the good morning light but enough to use lower ISO settings.
Lesson – Something you need to understand is that the light for that special photographs is by far the best early in the morning or late in the day, stretching up to about 1-2 hour after sunrise or about 1-2 hour before sunset. This time varies with season. It lasts longer in the winter because of the low sun in northern locations. If you want “The Light” shoot early or late. Midday stinks.
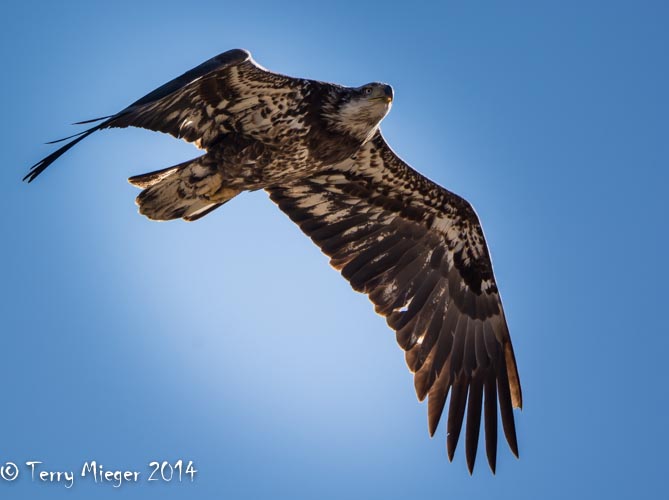
Lesson – Don’t expect a great number of useable images. Too many branches in the way, birds just not doing anything. In the days of film portraits these were fine but now you get to a point where you already have 500 sitting eagles. You need activity and/or interaction. They have to be doing something even if it is just flying. We shot about 150 frames and probably only four I like. This where timing kicks in. If you are not in the right place at the right time and prepared you will miss it. The lucky shot is usually the results of hours of waiting, looking, experience and being in the right spot. There is no such thing as lucky shot just hard work.
Lesson – Camera setting. Use a camera which you can set on continuous servo. This allows the camera to continually focus and not “lock on”. For area use a fairly small spot focus or if you can 3D tracking. You need to experiment. Focusing is tough. Set the shutter rate to the fastest you have. You will through away a lot but you will see the second or third in a sequence will be the sharpest. It has to do with the mechanics of pressing the button. Keep shutter speed up yet be aware of problems of higher ISO. Learn your camera. Accurate focus and fast shutter speed make sharp photos.
Lesson – get close. A longer lens, 400 mm on DX DSLR is good. Walk closer, you probably scare them away but in some areas they have little fear of man and it is possible. Know your location. Don’t crop the image too much know your camera and software.
Next week: The Frustration
This week’s Photo
“Immature Bald Eagle” 9 am early, low light show the underside of the bird, ISO 400; 1/2000 shutter speed; f 5.6; 1/2 EV over exposed for shadows; 400/600 mm, Aperture priority; spot metered. Cropped for composition; processed in Lightroom 5.3


