

Images from the Id – Secrets of the Secret Garden.
Let’s talk about flowers and other things in the Garden. Everyone likes to take flower pictures and with a little education and practice you can good from the ho-hum OK shots to the impressive special image. If you want something special plan ahead. The biggest problem is the light. Light is the foundation of any image and even more so here. Noon-high sun and the shadows it throws are the enemies of good lighting in any situation. The camera can not handle the high contrast range. In most situations, this means getting up early or starting late. The best light is about 2 hours after sunrise or 2 hours before sunset. This is the “Golden Hours” and many experienced photographers will not shoot any other time if they can help it. This true for the flower shooter but there are some other situations where we can improve on nature. Equipment to bring to the garden.
1-I prefer a DSLR (Digital Single Lens Reflex camera.) I like the DX (Nikon) or APS-C (Canon) sensor because it adds 50% magnification and is easier to get good blurring of the background, both are nice for flowers.
2 – Good Macro Lens – I like the Nikkon 105 mm f/2.8. Sigma makes a similar 105 mm. There are many others. They all let you get closer to the flower and that’s good.
3 – A round, folding 22” reflector which has a black side a grey side, a diffuser, silver, gold, white and black sides. This reflector is essential. It is used to reflect light into the shadows and create a false diffuse shade. The grey side is great for setting the white balance in difficult situations (a future topic?). This is a must item for even shooting with point and shoot cameras. You will be amazed by its simplicity and value. I use the gold reflector because it gives the early morning, warm look to the image that I like. The color of flowers looks better in the shade with a little reflected light and good white balance correction in the software. Lightroom makes this easy.
4 – Extension tubes allow any lens to focus closer. They come in sets of 3 which can be stacked in many variations and allow some choice as to what length to use.
5 – Tripod– some people use them some don’t. Sometimes when I don’t use a tripod I use a flash-next item.
6 – Flash- a ring flash is nice but don’t use your o camera flash. Better is a duo of flashes on a bracket each about 6 inches to the right and left sides of the camera. Nikon makes a nice one but this can be homemade. I saw some good results with and on camera flash set at about 20% and a second flash hand held a foot or two to the right or left. Used correctly flash can be great. Try using it to blacken, way under expose the background.
7 – Backgrounds are as import as the subject be a piece of non shinny black hobby foam, Other colors work too. Even an old photo can be cool.
This setup will work well with a flower shot or closeups (Macro) of insects and arachnids. As usual testing and practice will get results
As always go ahead and twist the rules!
Try backlighting and or shooting from the back. Add an insect for fun. Bees are tough sots but worth all of the effort.
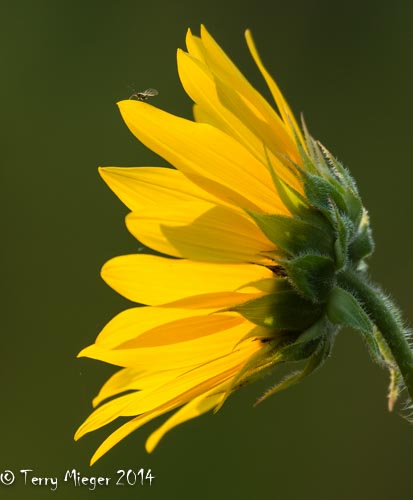
The Fly A winner in a competition for “Animals in their Environment” Backlit and direct sun but early in the day. 1/640 sec, f/5.6, 0 EV, No flash, ISO 200, Nikkor 80mm-400 mm G lens (hum a telephoto) at 400/600 mm, Nikon D7100

Burst – Taken in the shade with white balance correction etc. 1/320 sec, f/5.6, 0 EVC, No flash, ISO 100, Nikkor 105 mm prime (not a zoom)
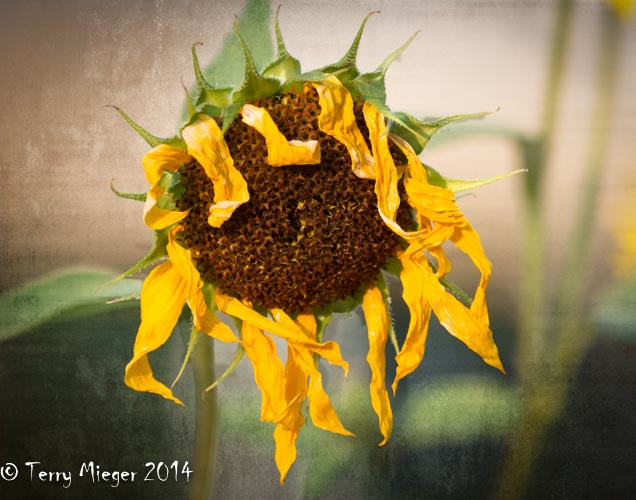
Sunflower – shoot something different 1/1000 sec, f/6.3, 0 EV, ISO 800, Nikkor 80mm -400 mm G Zoom again
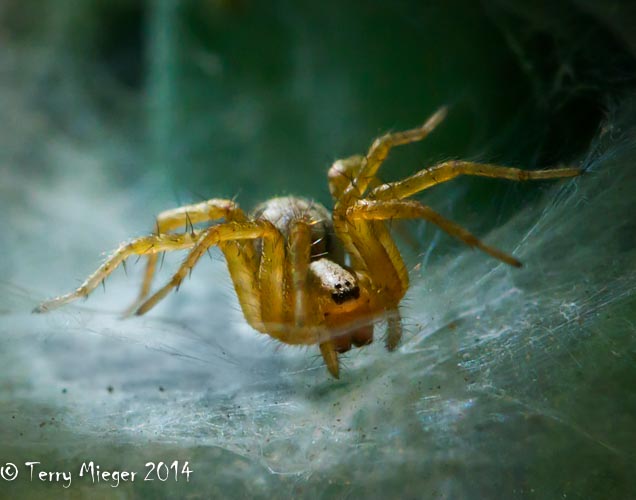
Spider- Something to do when you are tried of orchids. Another winner. 1/180 sec. f/13 (needed depth of field bad) 0 EV, No flash, ISO 800, Nikkor 105 mm Macro, 105 mm/157 mm Nikon D300. This is an extreme crop yet still worked well. It was about 1/4 inch long. At the LA Arboretum.
